Overview
Complete workflow for enabling enterprise SSO and self-serve configuration for your customers
Enterprise SSO enables users to authenticate to your application using their organization’s identity provider (IdP) such as Okta, Microsoft Entra ID, or Google Workspace. This provides enterprise customers with a secure, centralized authentication experience while reducing password management overhead.
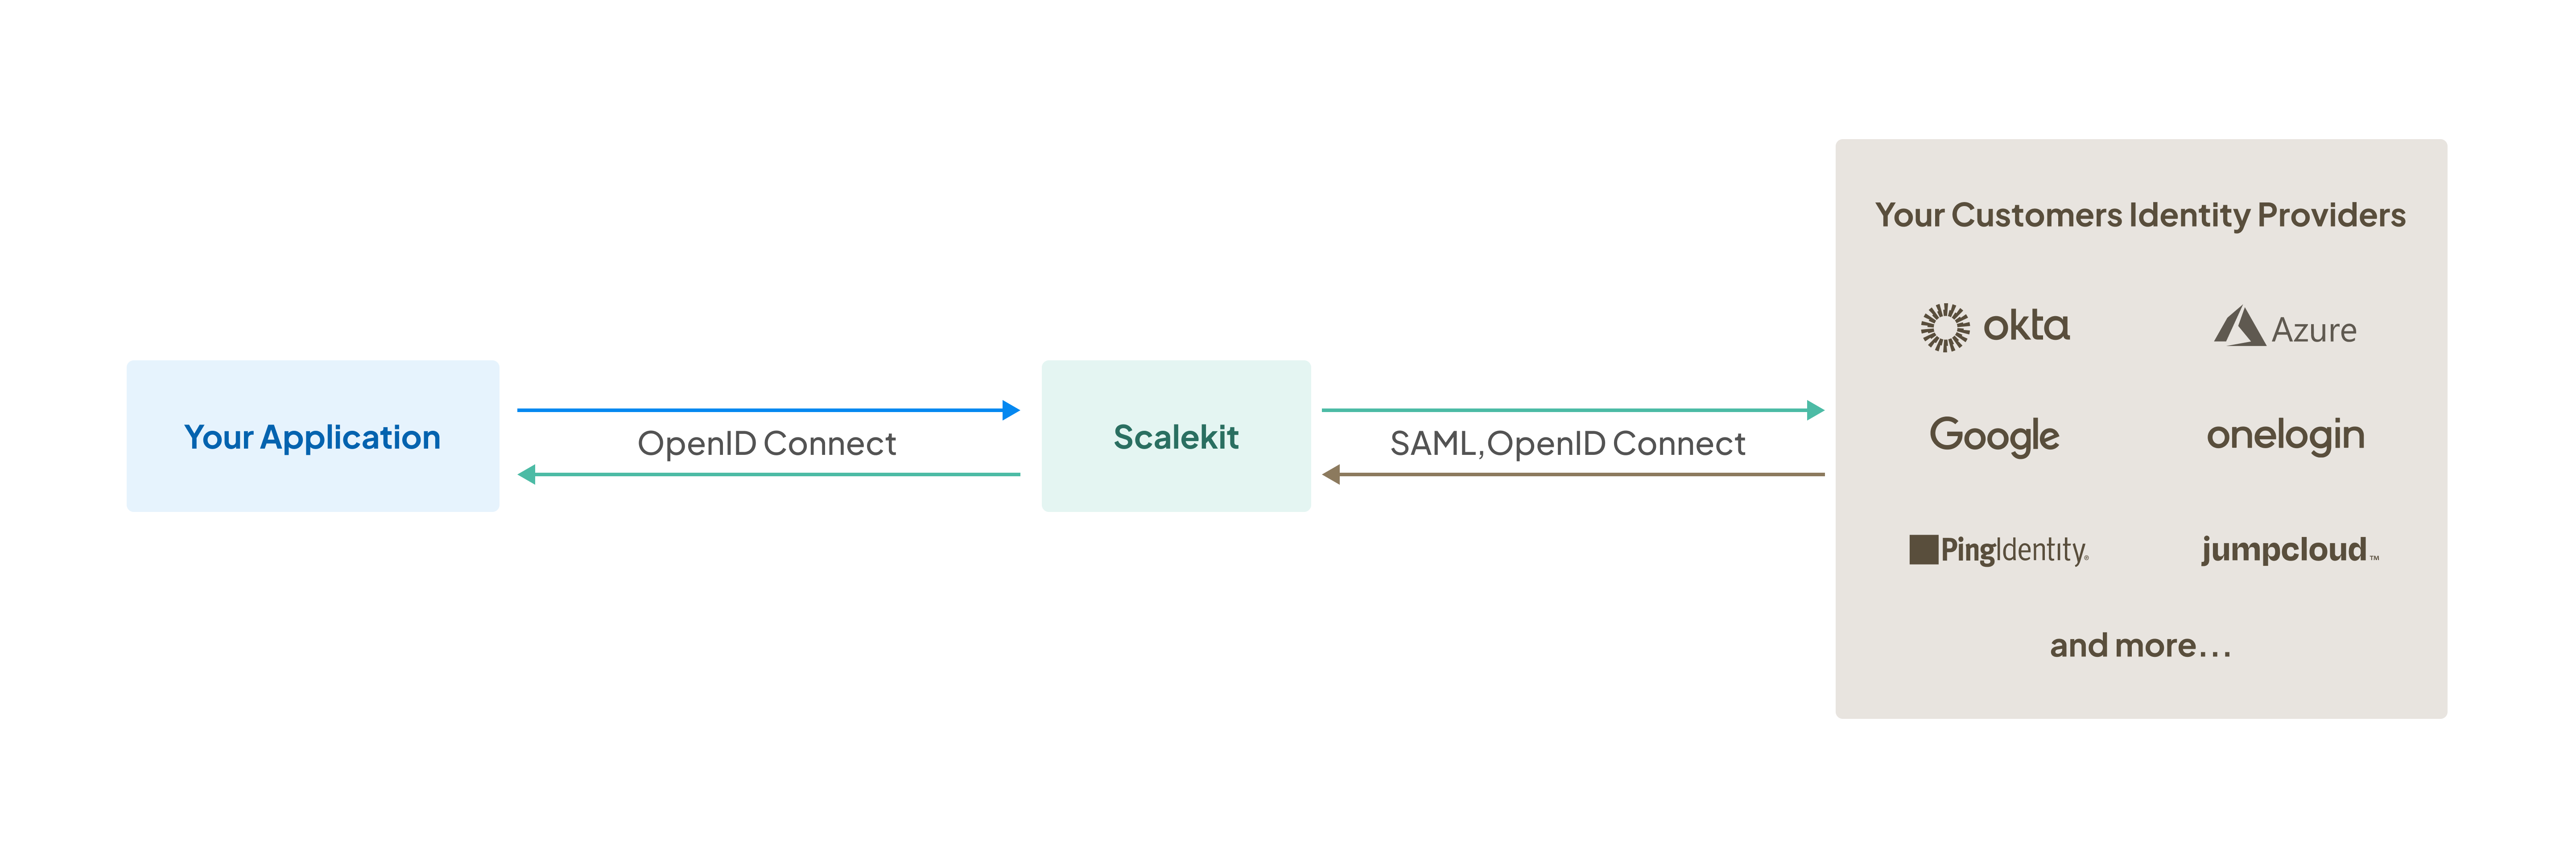
This guide walks you through the complete workflow for onboarding enterprise customers with SSO. You’ll learn how to create organizations, provide admin portal access, enable domain-based SSO, and verify the integration.
Before onboarding enterprise customers, ensure you have completed the Full Stack Auth quickstart to set up basic authentication in your application.
-
Create organization
Section titled “Create organization”Create an organization in Scalekit to represent your enterprise customer:
- Log in to the Scalekit dashboard
- Navigate to Dashboard > Organizations
- Click Create Organization
- Enter the organization name and relevant details
- Save the organization
Each organization in Scalekit represents one of your enterprise customers and can have its own SSO configuration, directory sync settings, and domain associations.
-
Provide admin portal access
Section titled “Provide admin portal access”Give your customer’s IT administrator access to the self-serve admin portal to configure their identity provider. Scalekit provides two integration methods:
Option 1: Share a no-code link Quick setup
Generate and share a link to the admin portal:
- Select the organization from Dashboard > Organizations
- Click Generate link in the organization overview
- Share the link with your customer’s IT admin via email, Slack, or your preferred channel
The link remains valid for 7 days and can be revoked anytime from the dashboard.
Option 2: Embed the portal Seamless experience
Embed the admin portal directly in your application so customers can configure SSO without leaving your interface:
- Generate a portal link programmatically using the Scalekit SDK
- Render the portal in an iframe within your application’s settings page
- Customers configure SSO directly in your UI
For complete implementation details including code examples in all supported languages, see the Admin portal implementation guide.
-
Customer configures SSO
Section titled “Customer configures SSO”After receiving admin portal access, your customer’s IT administrator:
- Opens the admin portal (via shared link or embedded iframe)
- Selects their identity provider (Okta, Microsoft Entra ID, Google Workspace, etc.)
- Follows the provider-specific setup guide
- Enters the required configuration (metadata URL, certificates, etc.)
- Tests the connection
- Activates the SSO connection
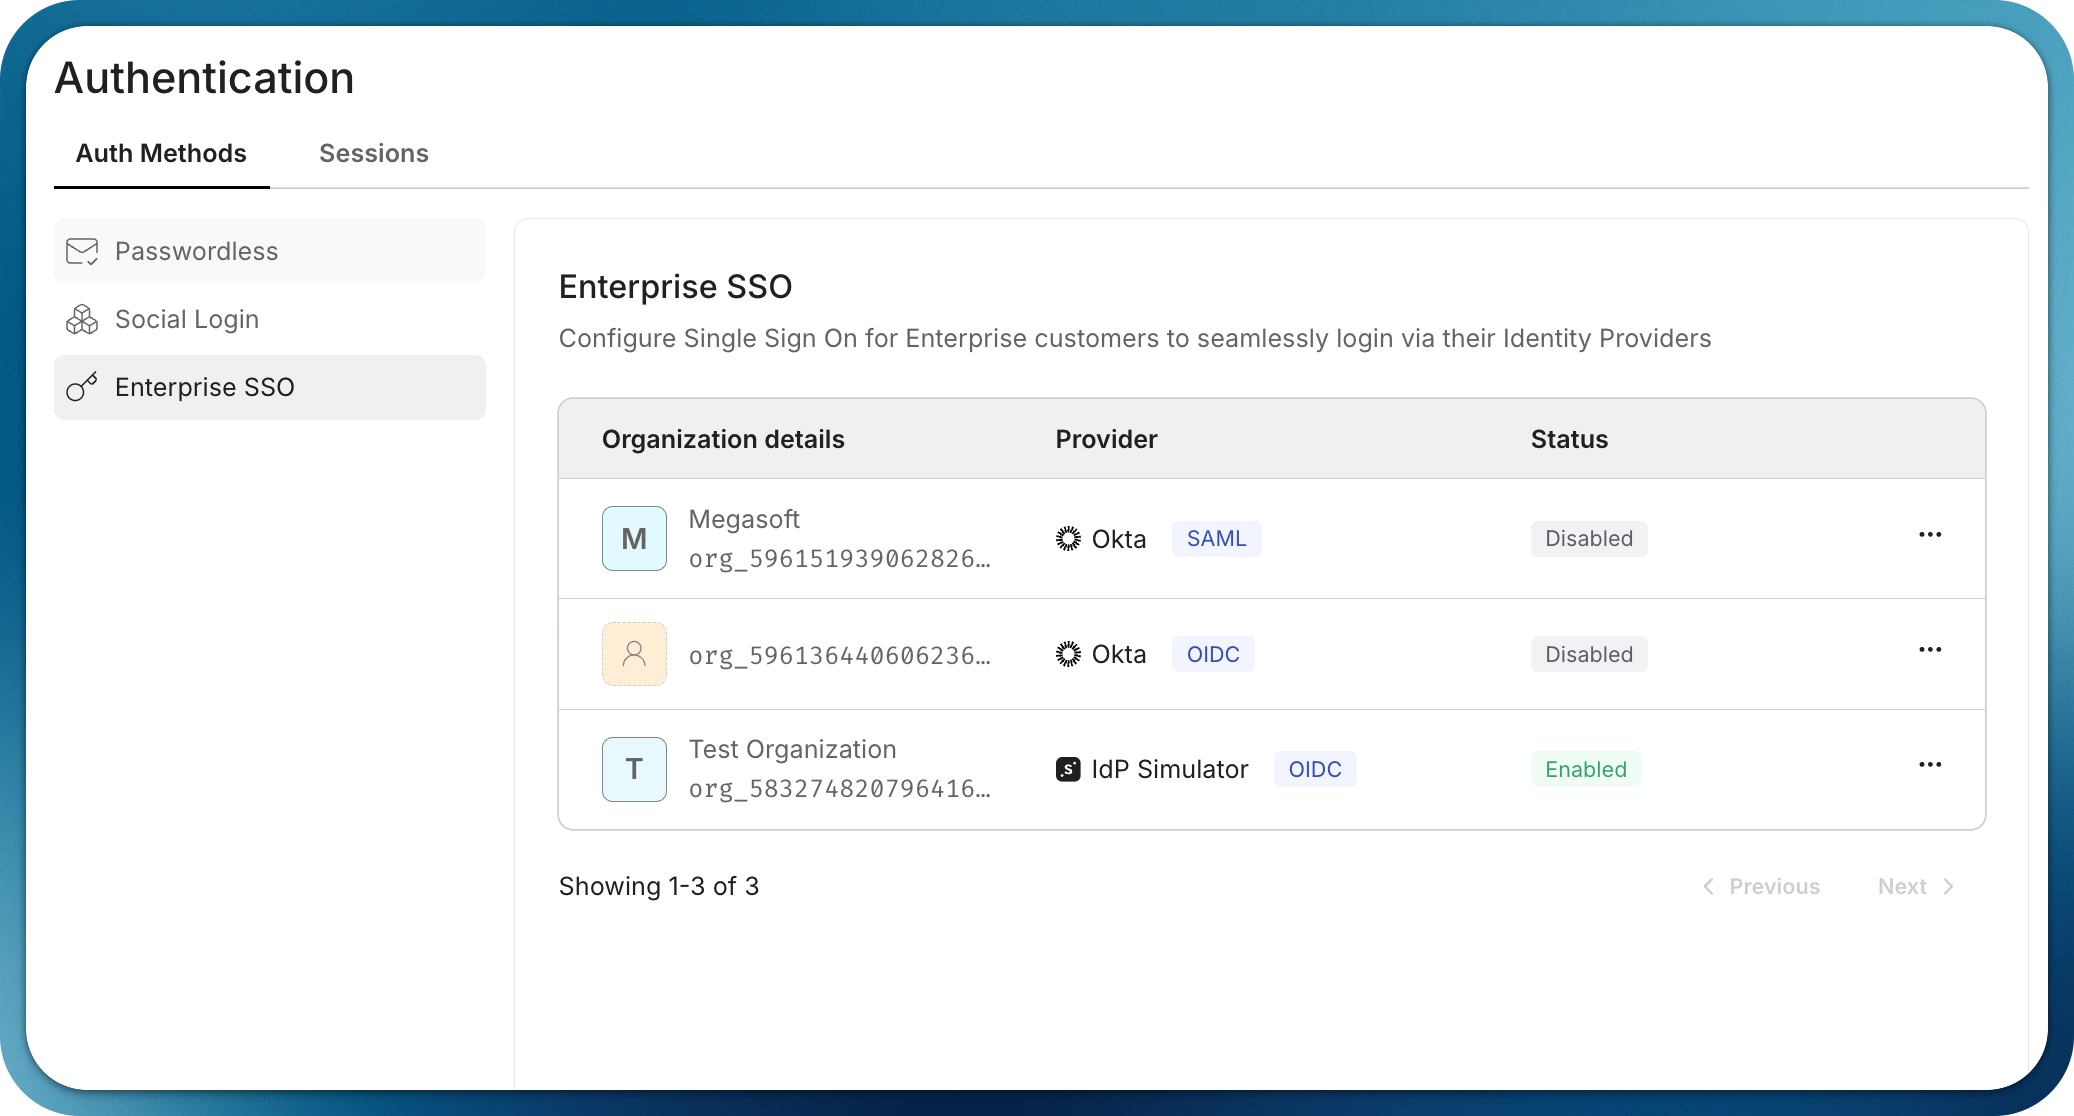
Once configured, the SSO connection appears as active in your organization’s settings:
-
Verify domain ownership
Section titled “Verify domain ownership”After SSO is configured, verify the organization’s email domains to enable automatic SSO routing. When domains are verified, users with matching email addresses are automatically redirected to their organization’s SSO login.
Verification methods:
- DNS verification Coming soon: Organization admins add a DNS TXT record to prove domain ownership through the admin portal
- Manual verification: Request domain verification through the Scalekit dashboard when domain ownership is already established
To manually verify a domain:
- Navigate to Dashboard > Organizations and select the organization
- Go to Single Sign-On settings
- Add the domain (e.g.,
megacorp.com) - Verify the domain through the dashboard
Once verified, users with email addresses from that domain (e.g.,
user@megacorp.com) can authenticate using their organization’s SSO. -
Test the integration
Section titled “Test the integration”Before rolling out SSO to your customers, thoroughly test the integration:
- Use the IdP Simulator during development to test without configuring real identity providers
- Test with real providers like Okta or Microsoft Entra ID in your staging environment
- Validate all scenarios: SP-initiated SSO, IdP-initiated SSO, and error handling
For complete testing instructions, see the Test SSO integration guide.
Resources for IT administrators
Section titled “Resources for IT administrators”Provide these resources to your customer’s IT team to help them configure their identity providers: