MCP authentication patterns
Authentication patterns: Human users via OAuth Authorization Code flow, autonomous agents via Client Credentials flow, and downstream integrations using API keys, OAuth, or token cascading
Scalekit provides secure authentication for MCP servers across three distinct patterns, each corresponding to different interaction models and trust boundaries. Understanding which pattern applies to your use case ensures you implement the right security model for your MCP server architecture.
This guide covers all three authentication patterns: human-to-MCP interactions, agent-to-MCP communication, and MCP-to-downstream integrations. Each pattern uses different OAuth 2.1 flows and has specific configuration requirements explained with sequence diagrams and practical guidance.
Pattern comparison
Section titled “Pattern comparison”Understanding the differences between these patterns helps you choose the right approach for your architecture. Each pattern serves specific use cases and has different security characteristics.
| Aspect | Human → MCP | Agent/Machine → MCP | MCP → Downstream |
|---|---|---|---|
| Actor | Human using AI host (Claude, ChatGPT, VS Code) | Autonomous agent or service | MCP Server making backend calls |
| OAuth Flow | Authorization Code | Client Credentials | Varies by sub-pattern |
| Initiator | User interaction in MCP client | Programmatic request | MCP server implementation code |
| Token Lifetime | Medium (typically hours) | Configurable (typically long-lived) | Depends on downstream system |
| User Consent | Required during authorization flow | Not applicable (pre-configured) | Not applicable |
| Scope Assignment | During consent prompt | At client registration | At implementation time |
| Best For | Interactive human workflows | Scheduled tasks, autonomous operations | Backend integration with APIs/services |
| Complexity | Medium (handles browser flow) | Low (direct token request) | Varies (simple to complex) |
Pattern 1: Human interacting with MCP server
Section titled “Pattern 1: Human interacting with MCP server”When a human uses a compliant MCP host application, that host acts as the OAuth client. It initiates authorization with the Scalekit Authorization Server, obtains a scoped access token, and interacts securely with the MCP Server on behalf of the user.
This pattern represents the most common interaction model for real-world MCP use cases - humans interacting with an MCP server through AI host applications like Claude Desktop, VS Code, Cursor, or Windsurf, while Scalekit ensures tokens are valid, scoped, and auditable.
Authorization sequence
Section titled “Authorization sequence”How it works
Section titled “How it works”-
Initiation – The human configures an MCP server in their MCP client application.
-
Challenge – The MCP Server responds with an HTTP
401containing aWWW-Authenticateheader that points to the Scalekit Authorization Server. -
Authorization Flow – The MCP Client opens the user’s browser to initiate the OAuth 2.1 authorization flow. During this step, the Scalekit Authorization Server handles user authentication through Magic Link & OTP, Passkeys, Social login providers (like Google, GitHub, or LinkedIn), or Enterprise SSO integrations (such as Okta, Microsoft Entra ID, or ADFS). The user is then prompted to grant consent for the requested scopes. Once approved, Scalekit returns an authorization code, which the MCP Client exchanges for an access token.
-
Token Issuance – Scalekit issues an OAuth 2.1 access token containing claims and scopes (for example,
todo:read,calendar:write) that represent the user’s permissions. -
Authorized Request – The client calls the MCP Server again, now attaching the Bearer token in the
Authorizationheader. -
Validation and Execution – The MCP Server validates the token issued by Scalekit and executes the requested tool.
Implementation
Section titled “Implementation”1. Register your MCP server in the Scalekit Dashboard
Section titled “1. Register your MCP server in the Scalekit Dashboard”Create a new MCP server in the Scalekit Dashboard to obtain your server credentials and configure authentication settings.
2. Implement the protected resource metadata endpoint
Section titled “2. Implement the protected resource metadata endpoint”Add a .well-known/oauth-protected-resource endpoint that provides your MCP server’s authentication configuration to clients.
3. Configure scopes for your server capabilities
Section titled “3. Configure scopes for your server capabilities”Define OAuth scopes that correspond to the tools and permissions your MCP server exposes.
4. Set up token validation middleware
Section titled “4. Set up token validation middleware”Implement middleware to validate incoming JWT tokens from Scalekit before processing MCP tool requests.
5. Test the complete authentication flow
Section titled “5. Test the complete authentication flow”Verify the end-to-end flow works with an MCP client to ensure secure authentication.
For complete implementation guidance, see the MCP OAuth 2.1 quickstart or framework-specific guides for FastMCP, FastAPI + FastMCP, and Express.js.
Pattern 2: Agent / machine interacting with MCP server
Section titled “Pattern 2: Agent / machine interacting with MCP server”An autonomous agent or any machine-to-machine process can directly interact with an MCP Server secured by Scalekit. In this model, the agent acts as a confidential OAuth client, authenticated using a client_id and client_secret issued by Scalekit.
This pattern uses the OAuth 2.1 Client Credentials flow, allowing the agent to obtain an access token without user interaction. Tokens are scoped and time-bound, ensuring secure and auditable automation between services.
Authorization sequence
Section titled “Authorization sequence”Client registration
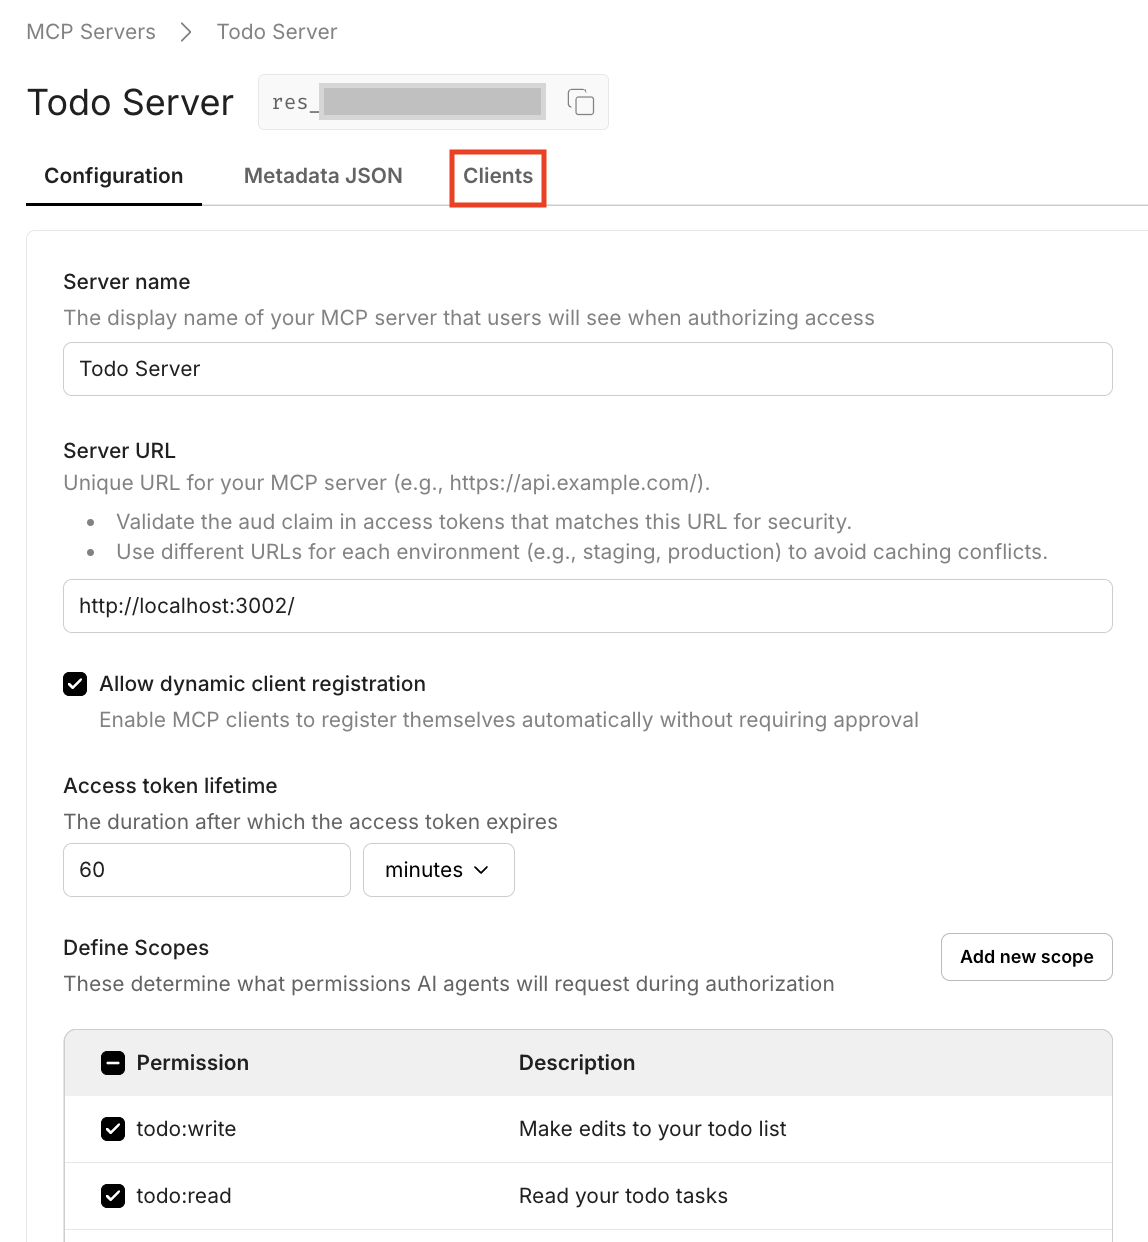
Section titled “Client registration”1. Navigate to the MCP Server Clients tab
Section titled “1. Navigate to the MCP Server Clients tab”Go to Dashboard > MCP Servers and select your MCP Server. Click on the Clients tab.
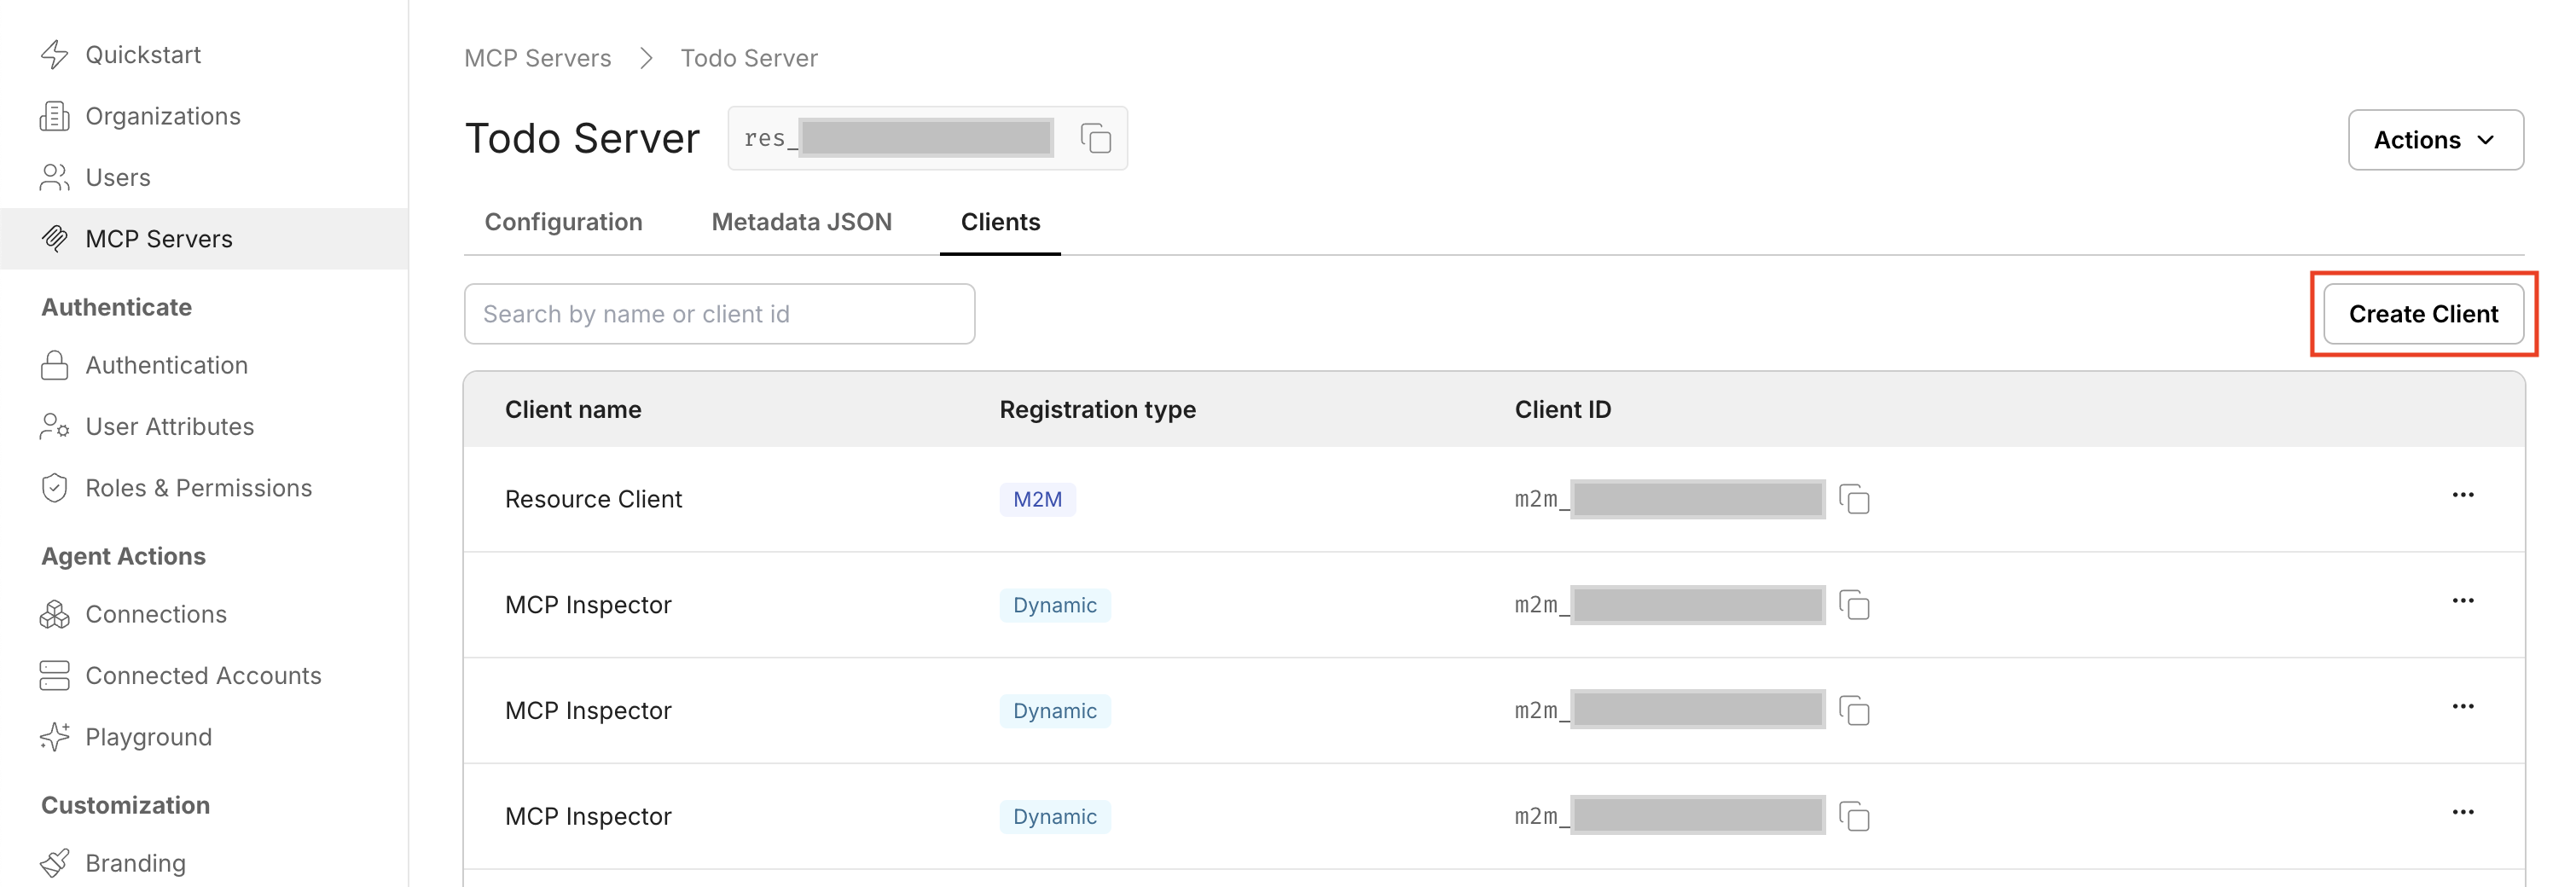
2. Create a new M2M client
Section titled “2. Create a new M2M client”Click Create Client to start the client creation process.
3. Copy your client credentials
Section titled “3. Copy your client credentials”Copy the client_id and client_secret immediately - the secret will not be shown again for security reasons. Store these securely in your agent’s configuration.
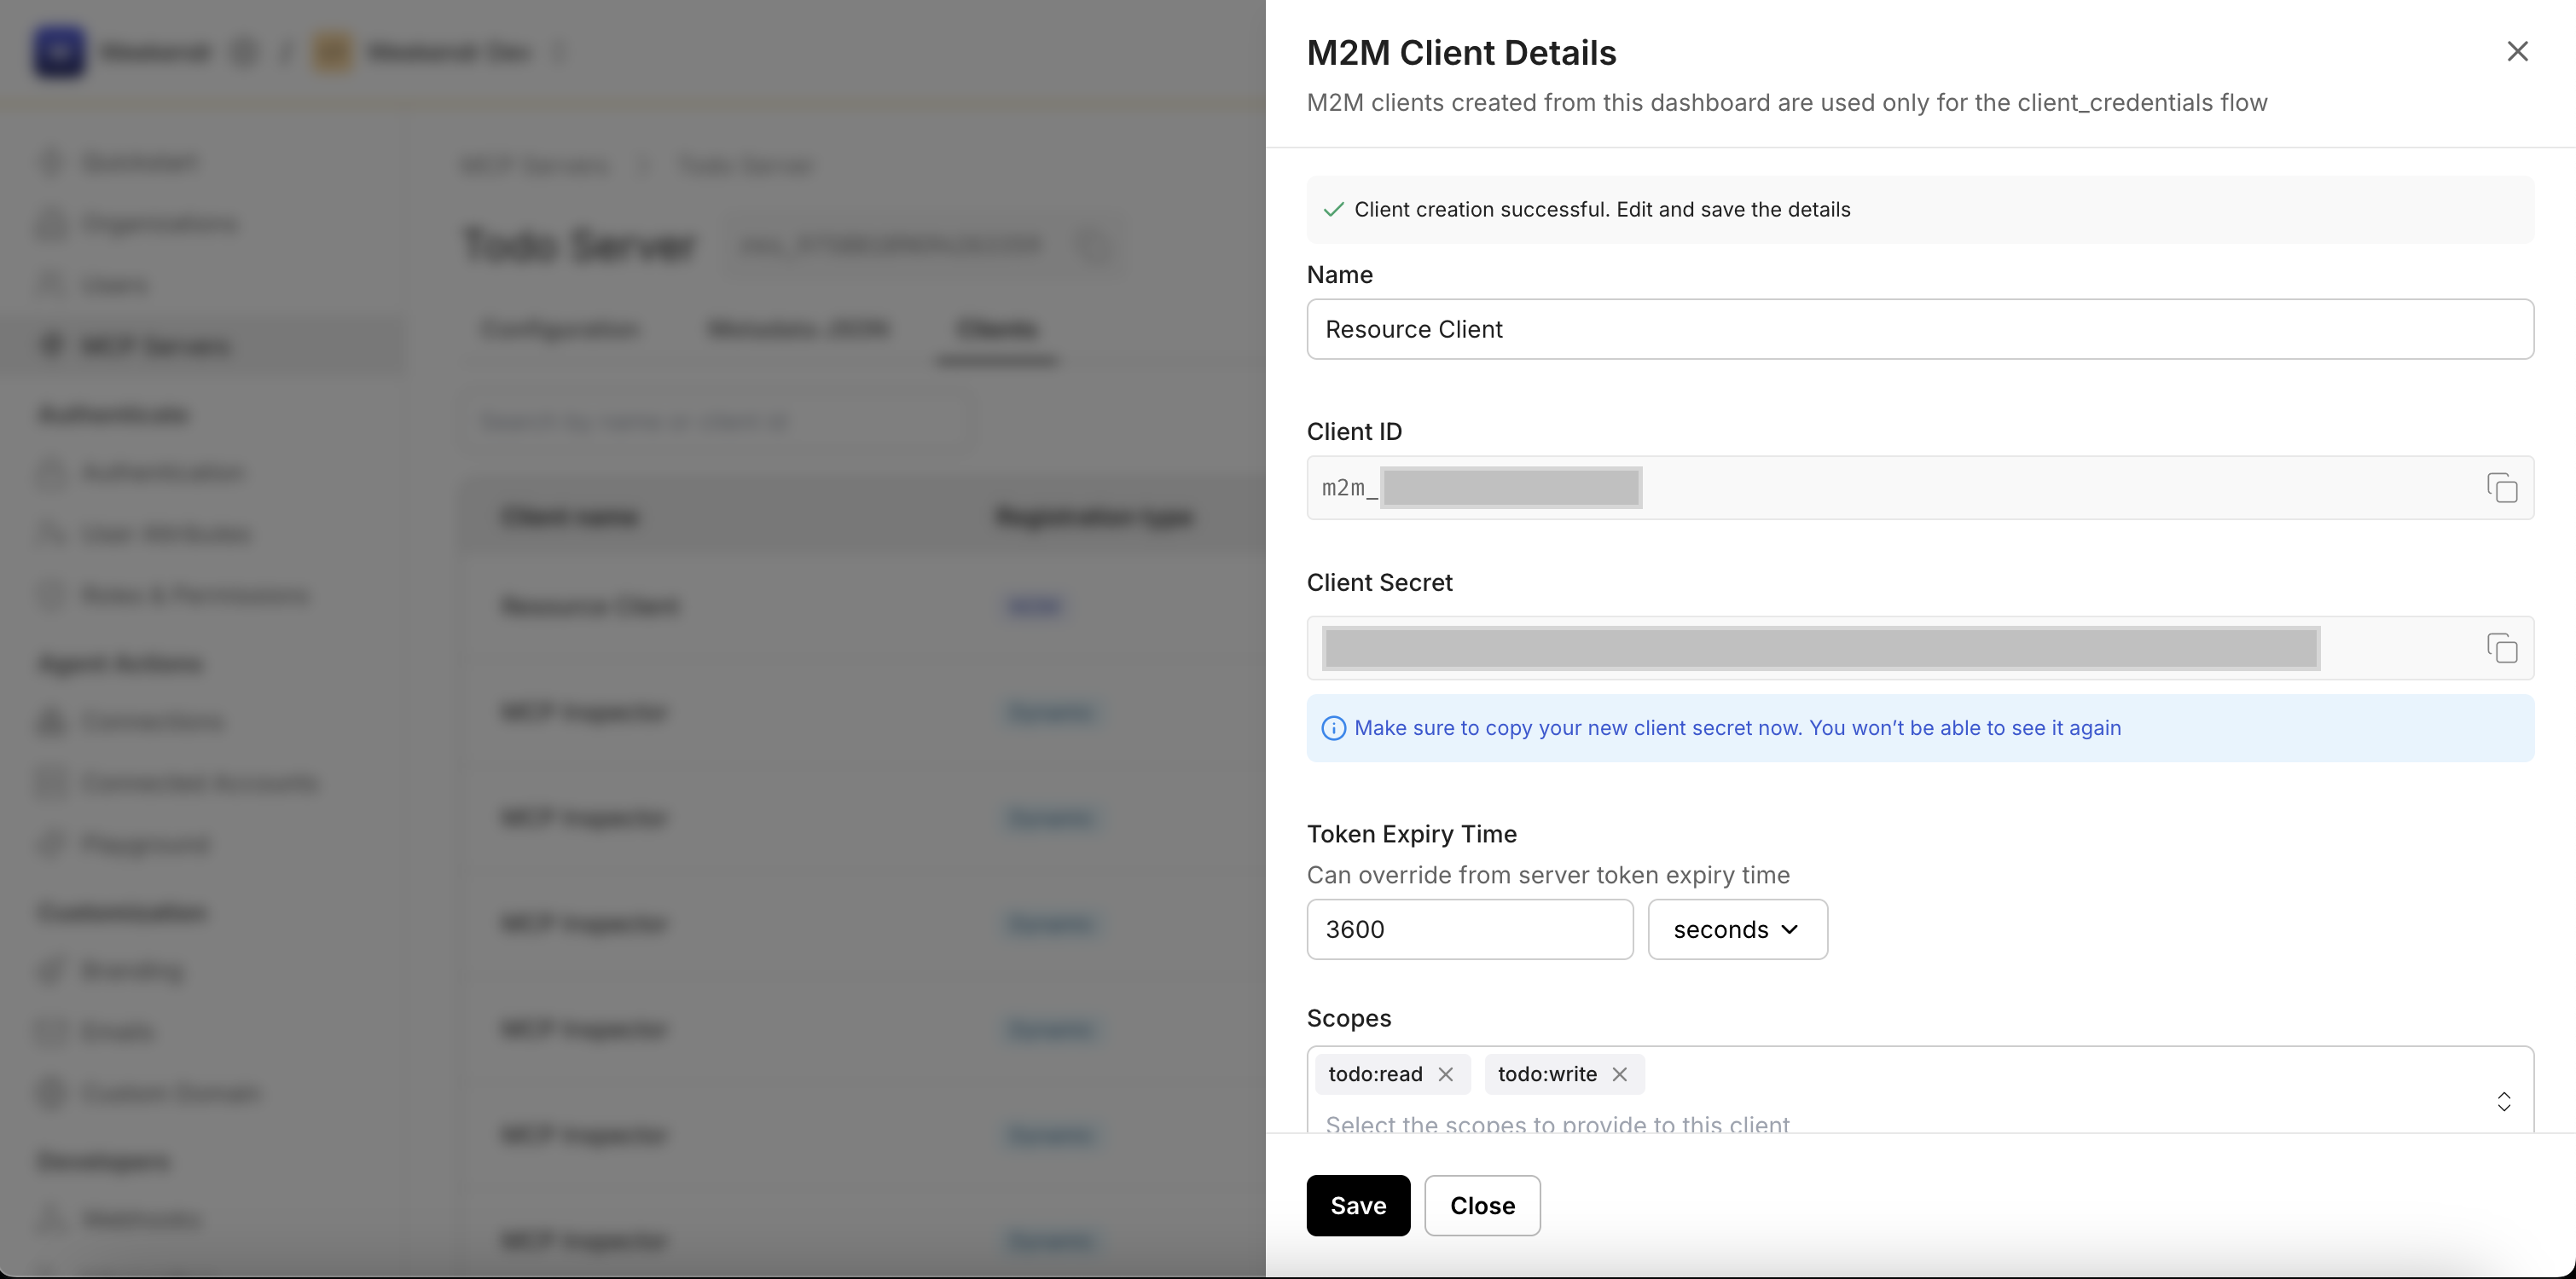
4. Configure client scopes
Section titled “4. Configure client scopes”Optionally, set scopes (e.g., todo:read, todo:write) that correspond to the permissions configured for your MCP Server. Click Save to complete the setup.
Requesting an access token
Section titled “Requesting an access token”Once you have the client credentials, the agent can request a token directly from the Scalekit Authorization Server:
curl --location '{{env_url}}/oauth/token' \--header 'Content-Type: application/x-www-form-urlencoded' \--data-urlencode 'grant_type=client_credentials' \--data-urlencode 'client_id={{client_id}}' \--data-urlencode 'client_secret={{secret_value}}' \--data-urlencode 'scope=todo:read todo:write'Scalekit responds with a JSON payload containing the access token:
{ "access_token": "eyJhbGciOiJSUzI1NiIsInR5cCIgOiAiSldUIn0...", "token_type": "Bearer", "expires_in": 3600, "scope": "todo:read todo:write"}Use the access_token in the Authorization header when calling your MCP Server’s endpoints.
Implementation
Section titled “Implementation”1. Create an M2M client for your target MCP server
Section titled “1. Create an M2M client for your target MCP server”Use the Scalekit Dashboard to create a Machine-to-Machine client for the MCP server you want to authenticate with.
2. Store client credentials securely
Section titled “2. Store client credentials securely”Store the client_id and client_secret using environment variables or a secrets manager. Never hardcode credentials in your agent code.
3. Implement token requests in your agent
Section titled “3. Implement token requests in your agent”Before making MCP calls, request access tokens using the OAuth 2.1 Client Credentials flow from the Scalekit Authorization Server.
4. Add token caching and refresh logic
Section titled “4. Add token caching and refresh logic”Implement caching to store tokens until they expire, and refresh them automatically to maintain uninterrupted service.
5. Attach tokens to MCP tool requests
Section titled “5. Attach tokens to MCP tool requests”Include the access token as a Bearer token in the Authorization header when calling MCP server tools.
For hands-on experience, use the FastMCP Todo Server from the FastMCP quickstart. Create an M2M client and run your token request programmatically within your agent code.
Pattern 3: MCP server integrating with downstream systems
Section titled “Pattern 3: MCP server integrating with downstream systems”In real-world scenarios, an MCP Server often needs to make backend calls - to your own APIs, to another MCP Server, or to external APIs such as CRM, ticketing, or SaaS tools. This section explains three secure ways to perform these downstream integrations, each corresponding to a different trust boundary and authorization pattern.
Sub-pattern 3a: Using API keys or custom tokens
Section titled “Sub-pattern 3a: Using API keys or custom tokens”Your MCP Server can communicate with internal or external backend systems that have their own authorization servers or API key-based access. In this setup, the MCP Server manages its own credentials securely (for example, in environment variables, a vault, or secrets manager) and injects them when making downstream calls.
Authorization sequence
Section titled “Authorization sequence”When to use this pattern
Section titled “When to use this pattern”- External APIs have their own authentication (AWS, Stripe, Twilio, etc.)
- Internal systems use proprietary authentication mechanisms
- Legacy systems that don’t support OAuth 2.1
- You control credential management and rotation
Example scenario
Section titled “Example scenario”- The MCP Server stores an API key as
EXTERNAL_API_KEYin environment variables - When a tool (e.g.,
get_weather_data) is called, your MCP server attaches the key in the request headers - The backend API validates the key and responds with data
- The MCP Server processes and returns the formatted response to the client
Sub-pattern 3b: MCP-to-MCP communication
Section titled “Sub-pattern 3b: MCP-to-MCP communication”If you have two MCP Servers that need to communicate - for example, crm-mcp calling tools from tickets-mcp - you can follow the same authentication pattern described in Pattern 2 above.
The calling MCP Server (in this case, crm-mcp) acts as an autonomous agent, authenticating with the receiving MCP Server via OAuth 2.1 Client Credentials Flow. Once the token is issued by Scalekit, the calling MCP uses it to call tools exposed by the second MCP Server.
Authorization sequence
Section titled “Authorization sequence”Implementation
Section titled “Implementation”The implementation follows Pattern 2 (Agent/Machine → MCP):
- Create an M2M client for the receiving MCP server in Scalekit
- Configure the calling MCP server with the client credentials
- Request tokens using the Client Credentials flow
- Call the receiving MCP’s tools with the Bearer token
For detailed implementation guidance, refer to the Pattern 2 section above.
Sub-pattern 3c: Cascading the same token
Section titled “Sub-pattern 3c: Cascading the same token”In some cases, you may want your MCP Server to forward (or “cascade”) the same access token it received from the client - for example, when your backend system lies within the same trust boundary as the Scalekit Authorization Server and can validate the token based on its issuer, scopes, and expiry.
Authorization sequence
Section titled “Authorization sequence”When to use this pattern
Section titled “When to use this pattern”Use token cascading when:
- Both systems (MCP Server and backend API) trust the same Authorization Server (Scalekit)
- The backend API can validate JWTs using public keys or JWKS URL
- Scopes and issuer claims (
iss,scope,exp) are sufficient to determine access - You need to preserve the original user context across service boundaries
Implementation requirements
Section titled “Implementation requirements”For the backend API to validate cascaded tokens:
- Configure the backend to validate JWT signatures using Scalekit’s public keys
- Verify the token’s
iss(issuer) claim matches your Scalekit environment - Check the
aud(audience) claim includes the backend API’s identifier - Validate the
exp(expiration) claim to reject expired tokens - Verify required scopes are present in the token’s
scopeclaim
Choosing the right pattern
Section titled “Choosing the right pattern”Use this decision guide to select the appropriate authentication pattern for your use case:
For human users accessing MCP tools: → Use Pattern 1: Human → MCP (Authorization Code Flow)
For autonomous agents or scheduled tasks: → Use Pattern 2: Agent/Machine → MCP (Client Credentials Flow)
For MCP server making backend calls:
- External APIs with their own auth → Use Pattern 3a: API Keys
- Another MCP server you control → Use Pattern 3b: MCP-to-MCP (Client Credentials Flow)
- Backend within same trust boundary → Use Pattern 3c: Token Cascading
Next steps
Section titled “Next steps”Now that you understand the authentication patterns, you can:
- Follow the MCP OAuth 2.1 quickstart to implement Pattern 1 or Pattern 2
- Explore framework-specific implementations:
- FastMCP quickstart for Python with built-in provider
- FastAPI + FastMCP quickstart for custom Python middleware
- Express.js quickstart for Node.js/TypeScript servers
- Review the MCP authentication demos on GitHub for complete working examples